Special thanks to my dad for all of his help and expertise.
Finished September 2022

Process Blog
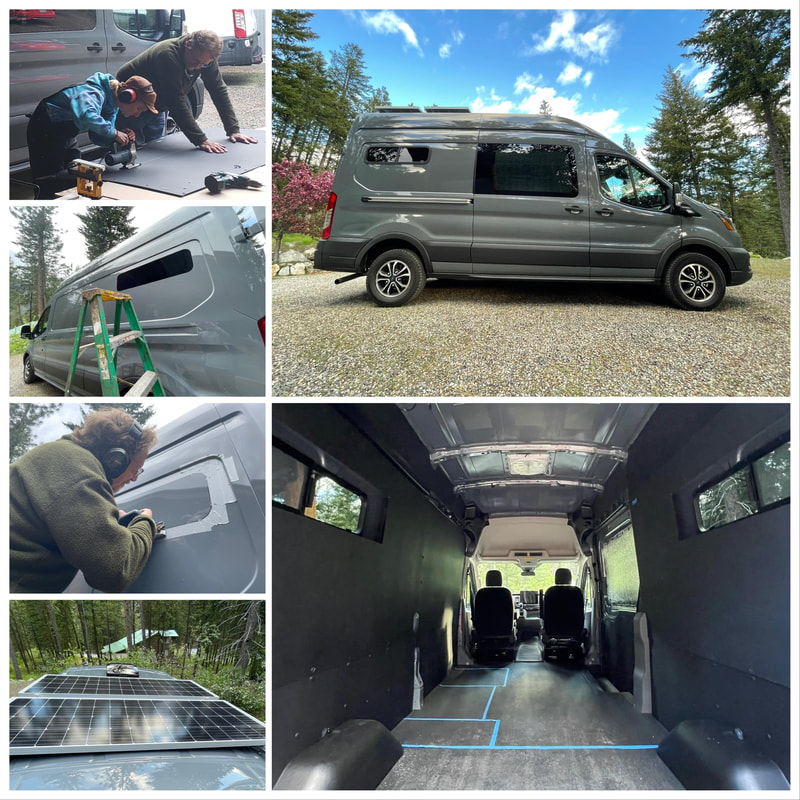
Week 1After picking up my new Ford Transit from the dealership on May 11, we started by installing the passenger seat rotator. After that, we marked, cut, filed, and rust-proofed the holes for the two rear bunk windows and fan on top. We then installed the windows and fan, sealed everything with silicone, built the rack for the solar panels out of 80/20 material, and secured the two, 200W panels to the rack. We also created the magnetic window coverings for the rear and sliding door windows.
|
|
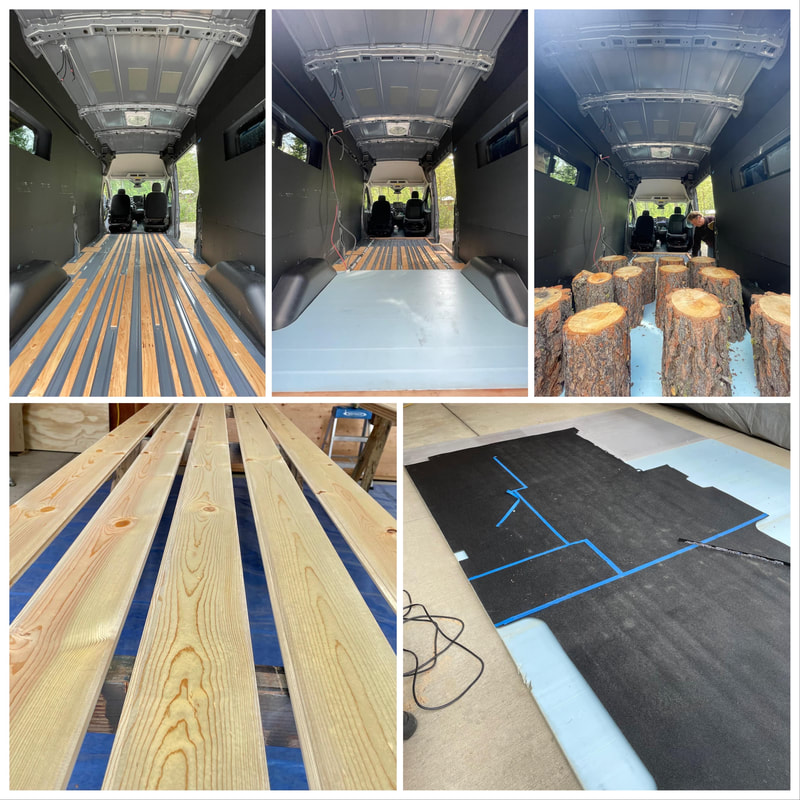
Weeks 2-3After cutting all of the needed holes in the van during the first week, we turned our attention to the floor. First, we cut 3/8-inch plywood into strips to fill the gaps and level the floor. We then used the rubber floor mat that came in the van as a template to cut the 1-inch rigid foam insulation to the shape of the floor. We also assembled and ran wires through the PVC conduit that will eventually connect the electrical system under the bed to the starter battery. After that, we used silicone to attach the leveling boards to the body of the van and the tops of the ridges in the van to the foam, and PL300 to attach the leveling boards to the foam. When we finished glueing everything, we weighed it all down with large logs. We also got a head start on the ceiling by sanding and finishing the tongue and groove pine boards that will run lengthwise down the van. It took about five coats of polyurethane and a full weekend day of work to get the boards to a place where they were satisfactorily finished.
|
|
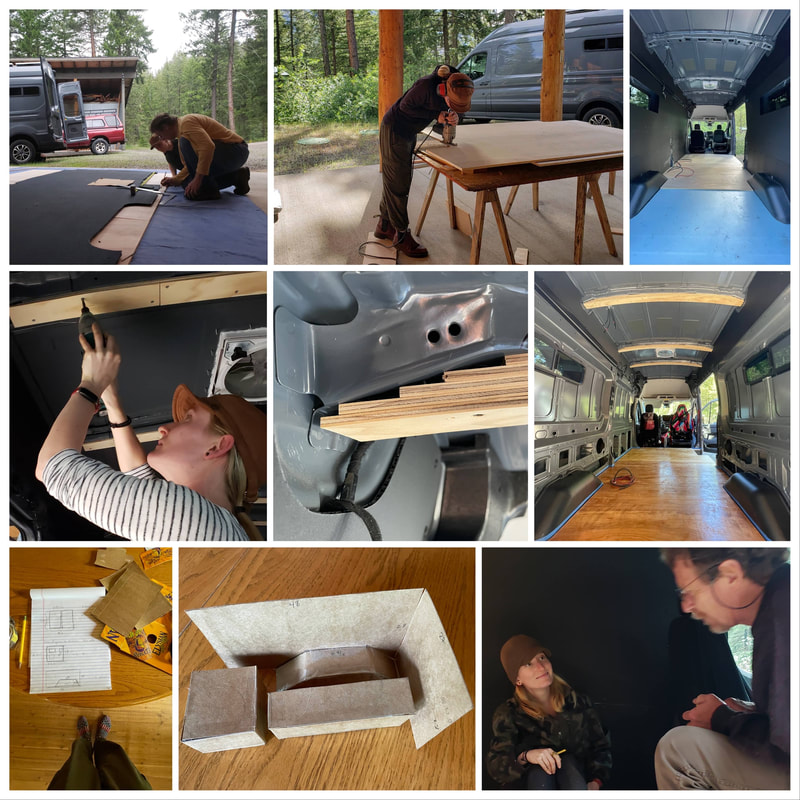
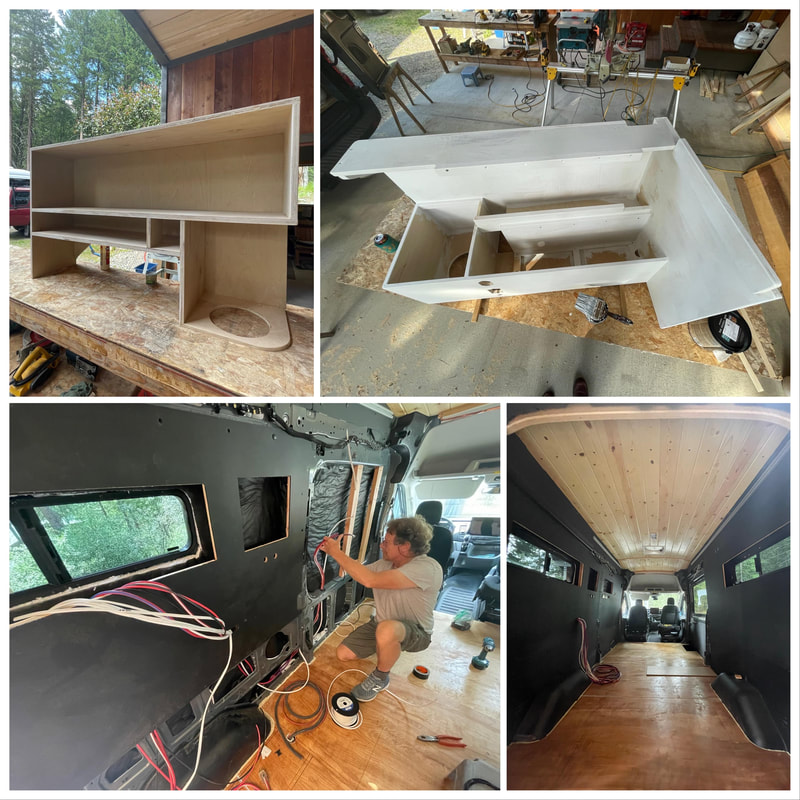
Week 4To finish off the first month of the build, we started by again using the rubber mat as a template to cut the 1/2-inch plywood to the shape of the floor and used PL300 to secure the plywood to the foam. We then waterproofed the plywood (which will eventually be covered in rigid cork flooring) with polyurethane. After that, we created ridges along the ceiling by layering 1/4-inch plywood along the ridges that already exist in the body of the van. Layering the plywood like this neatly accommodates the irregular shape of the van along the sides and provides a perfect, evenly-arched surface to which to attach the pine boards after we finish with wiring and insulation.
After that, we mapped out the area under the bed and around the wheel well that will house the electrical box. Because visualizing the corner space properly on graph paper was difficult for me, I got a little creative with a beer box and made a small cardboard model. This model allowed us to compare two different battery box layouts and make a decision about what will best utilize the space. |
|
Weeks 5-6To start the second month of the build, we ran wires from the area where the electrical box will sit to many of the outlets and appliances throughout the van. We also added some additional wood framing around the fan and a couple other key areas for structural support. After that, we cut and glued - or stuffed - 3M Thinsulate insulation in the panels, ceiling, sliding door, and all of the gaps we could find around the van. We also used silicone to glue wood backing to the windows, electrical outlets, and cubby holes that we cut in the black plastic wall panels so as to provide extra support and a solid surface to which to attach the jam and/or trim.
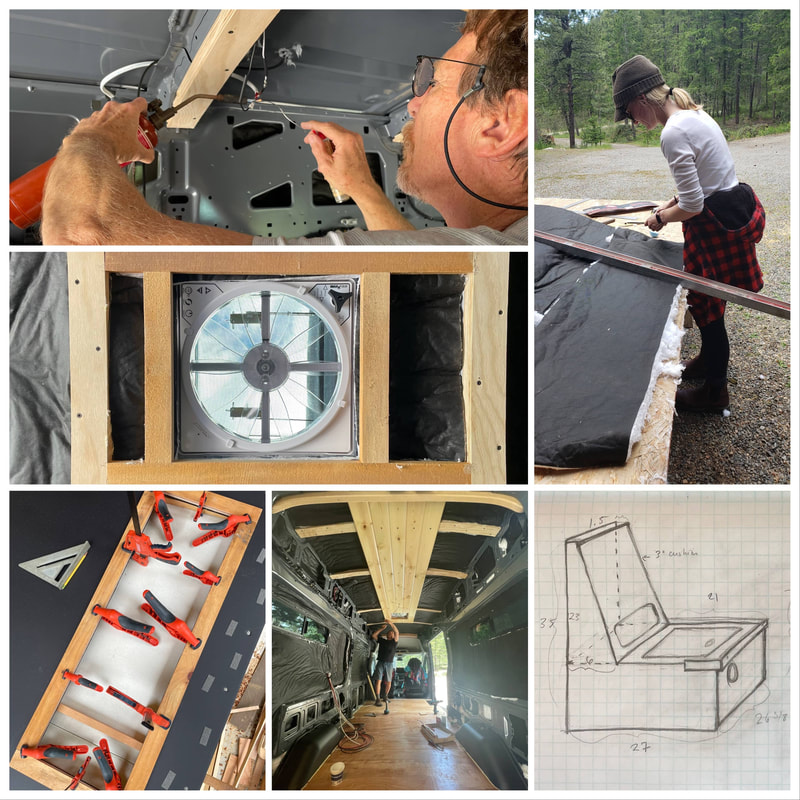
We then started on the pine ceiling and began fine-tuning plans for the chair, as well as the storage and utility boxes under the bed. It was very satisfying watching the pine ceiling come together as it is the first finished part of the van that will be visible once the build is complete. |
|
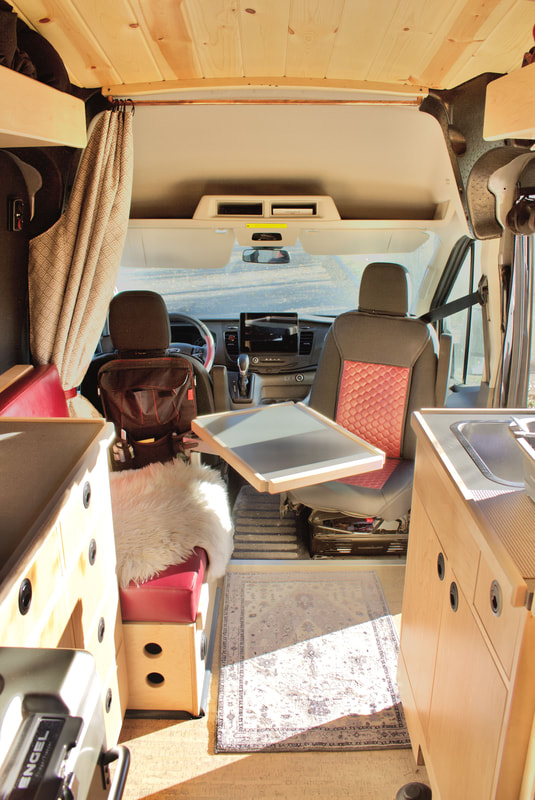
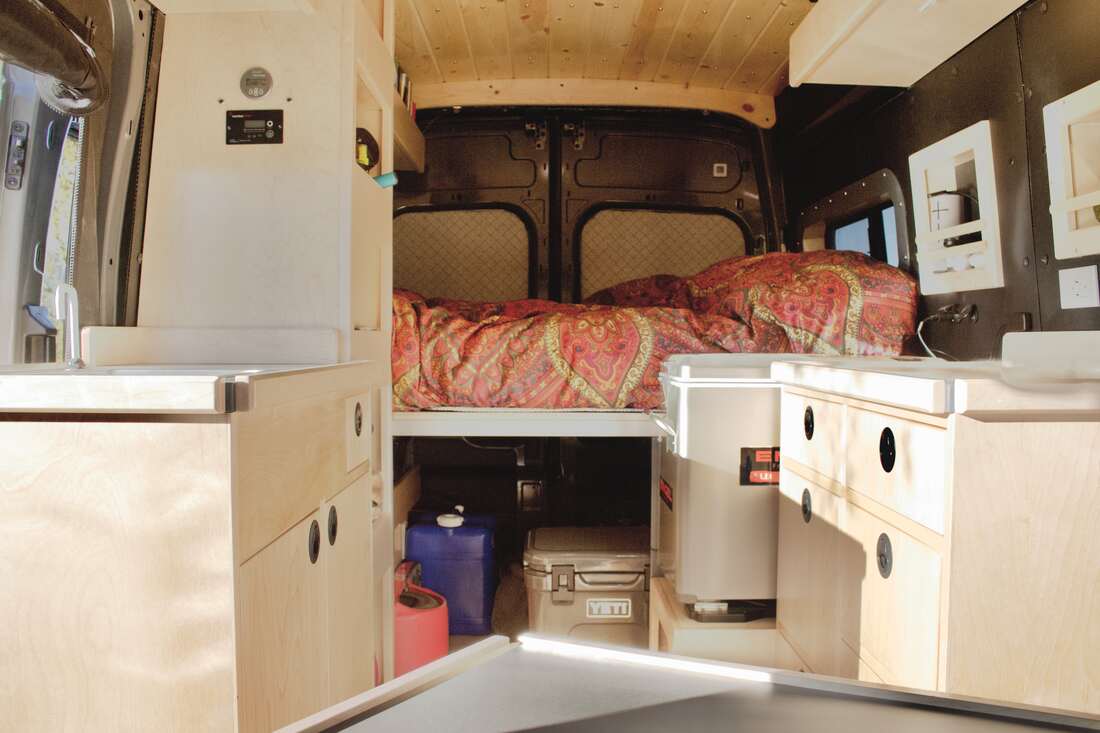
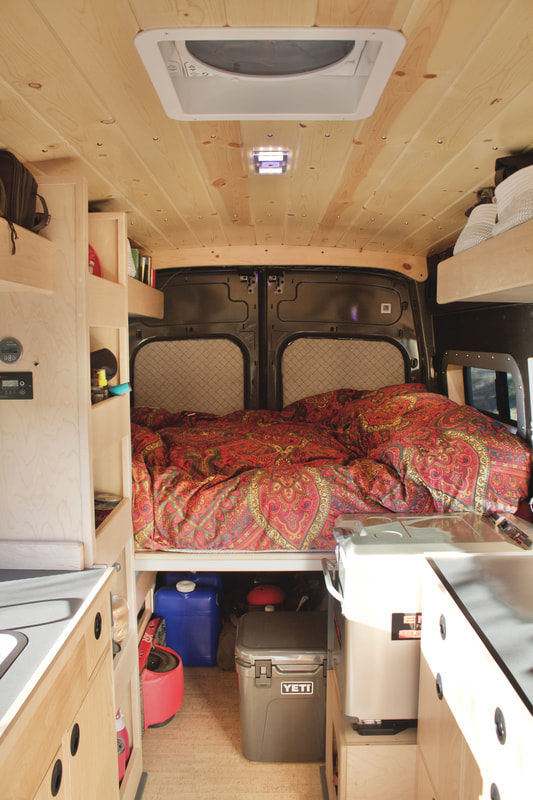
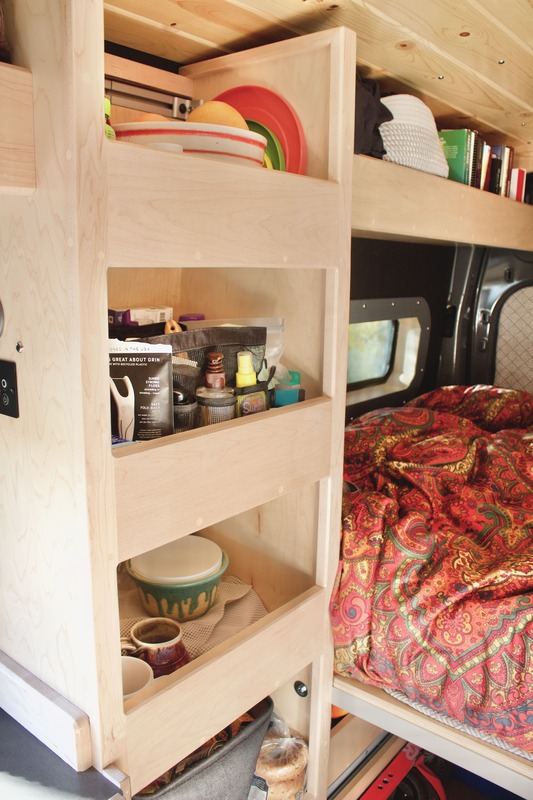
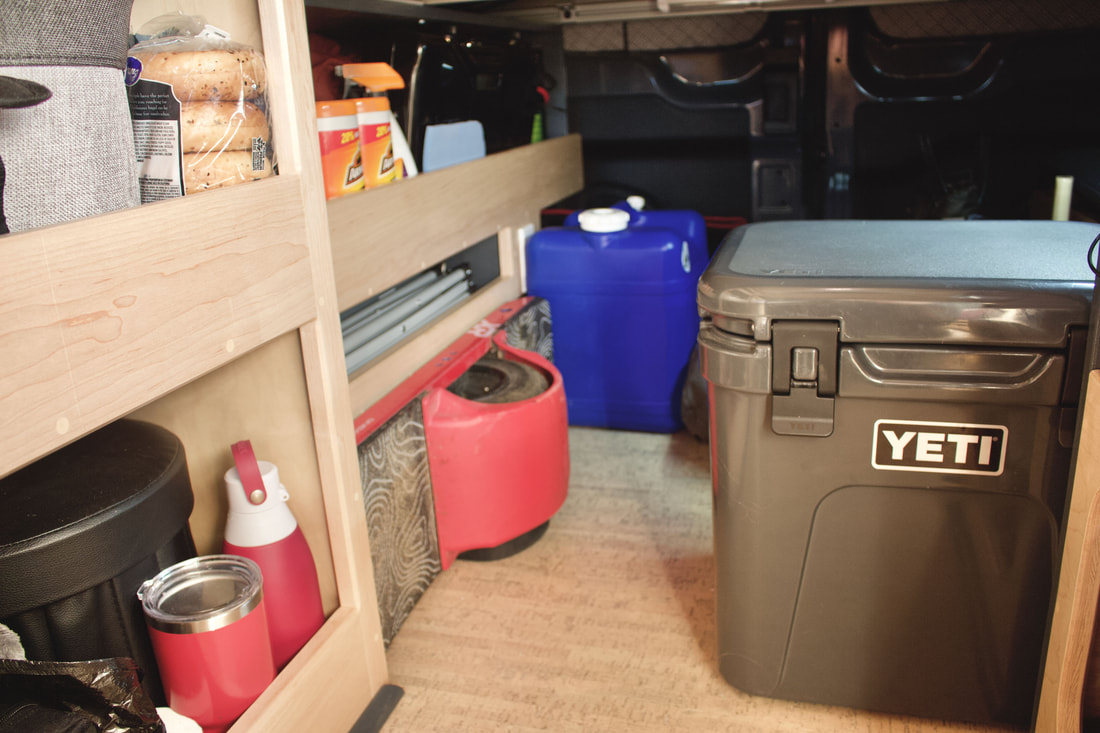
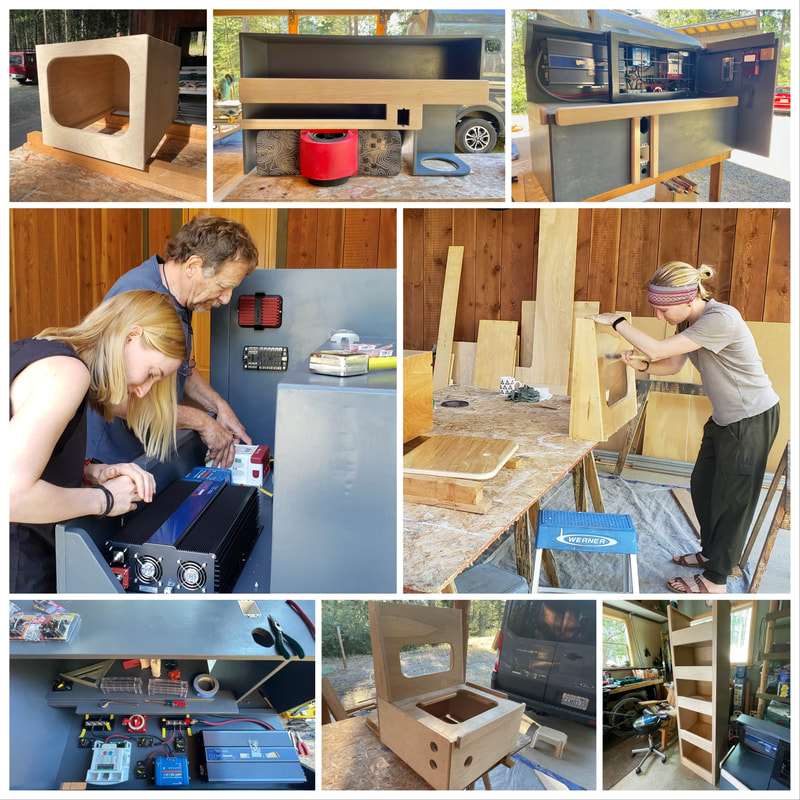
Weeks 7-8After finishing the ceiling, we designed and built the shelving and electrical boxes that provide protection for the electrical system, storage for lesser-used items, and structural support for the bed, which will sit on top of 80/20 material that will be attached to the walls and run along the top of the boxes. The electrical box (top right) will house the batteries, propane tank, solar charge controller, inverter, battery-to-battery charger, fuse box, and more.
We also finished running the remaining wires, reattached the black plastic wall panels, and attached the 80/20 material that will hold the upper storage bins. Attaching the 80/20 material required more effort than it may seem because we had to take the material to the local welding shop to drill the holes on a drill press. The metal near the front is noticeably denser than in the back and took a lot of strength, time, and drill bits to drill the size of holes that we needed. |
|
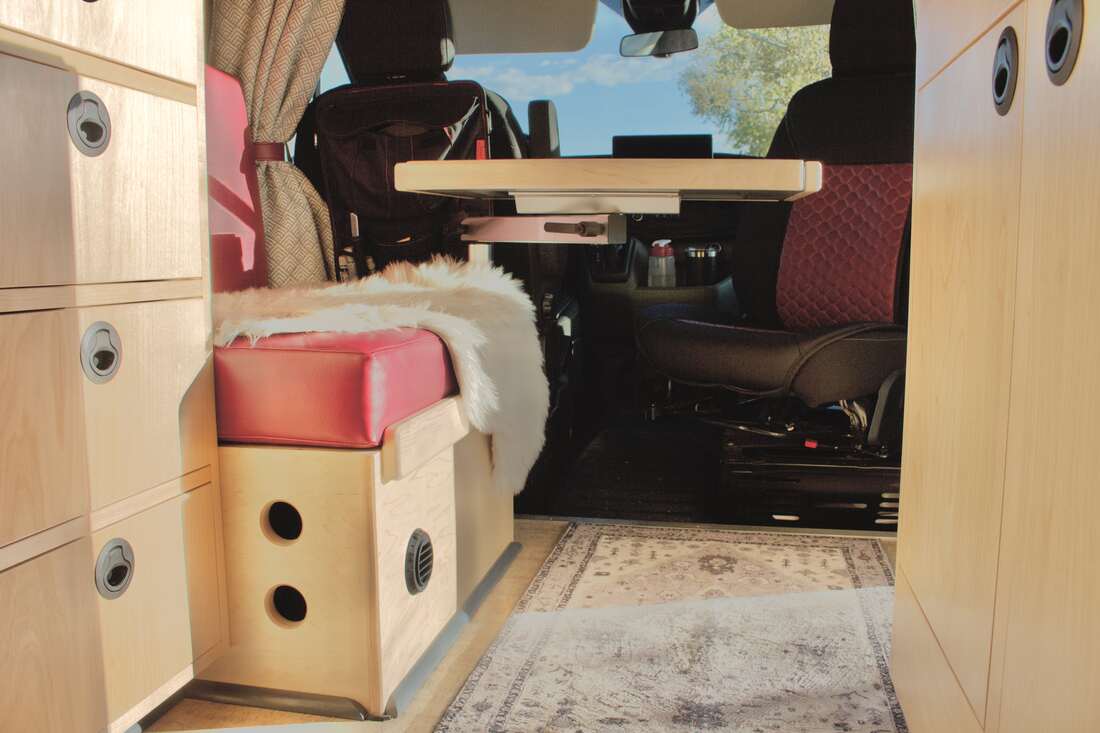
Weeks 9-12After building the electrical box and under-the-bed shelving, we built the chair, vertical shelves, and under-the-fridge box. We also laid out the electrical system, following Far Out Ride's schematic.
(Yes, one of the under-the-bed shelving units was built specifically to accommodate my Onewheel). We also painted the under-the-bed storage to match the van exterior and finished the shelf faces and trim with solid maple. Everything got a least two coats of polyurethane, and sometimes as many as six coats. |
|